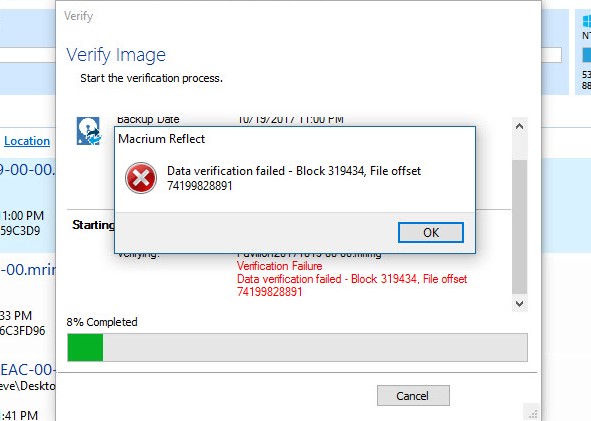
So about a month or so I was running my full monthly backup on my HP Pavilion 17-g121wm laptop using Macrium Reflect. The full backup ran without a hitch as it always does and then the verification cycle began. I left the laptop to complete it’s mission and came back an couple of hours later to this error message:
Data Verification Failed?? What does that mean? Was it the reading of the data on the laptop in creating the image? Was it the writing of the image to the USB Drive that I was using? Where do you even begin to troubleshoot this??? I could always test the image by trying to restore it to my laptop which would have made absolutely no sense because I could have ended up losing valuable data that I have accumulated since the previous month’s image if the image was corrupted. So I opted for the next easiest thing to do which was verify that my USB drive was not the culprit.
I use a USB 3.0 1TB My Passport Ultra (Affiliate Link) for local storage of my backups. This particular drive I have owned for years and always had good luck with it but I have a few of them to backup my other machines as well. You can get them for around $50 bucks now and I think it’s well worth it! I didn’t use any elaborate testing software or anything. All I used is the Windows CHKDSK utility. There are tons of tutorials all over the Internet to show you how to do this if you need to. It’s always good to monitor the health of your drives so it’s good to know information anyway.
I ran CHKDSK H: and it reported 0 issues. SO now it appeared that my USB Drive was fine and that left me back at square one with what the Block and File Offset problems could be coming from because if the issue isn’t my USB Hard Drive then it has to be something with my laptop hardware and that’s never fun to troubleshoot!
After a few Google searches I ended up on Macrium’s website in a troubleshooting section that specifically referred to Verification Failures which is located here.
They seemed to concur that this is typically caused by hardware issues even though my laptop was still saying that my C: was healthy, my RAM was showing 16GB as it should, and I had no other noticeable issues with any of the programs that I used on a daily basis that would indicate some sort of failure in general. So now I had to verify that the RAM wasn’t the issue.
Beginning with Windows 7, Microsoft included a neat little utility to test your system’s memory called Windows Memory Diagnostic. You can get to it by Clicking on Start, then search for mdsched.exe or Memory and it should show up. Basically it schedules a memory test for the next time you reboot. There are a lot of different options you can select depending on how in-depth of a test you want performed. I went with the default settings and figured I would dive in deeper if it came back saying everything was OK, but it didn’t.
I watched the test run and almost immediately it came back saying I had a system issue that I needed Vendor involvement to fix. So in other words, something was up with one of my 2 RAM sticks. The only problem with that is that it either didn’t say which one was causing the problem or I just flat out missed it.
I opened up the laptop and removed one of the RAM sticks which brought me down to 8GB of RAM and then ran the memory diagnostic once again. The test found no issues this time and said my RAM was good to go. Then I removed that stick of ram and installed the other 8GB stick and ran the test again but this time I received the same error message as before saying Vendor involvement was required.
I pulled that RAM stick out and stuck it in an ESD Safe bag. Then I replaced the reported good RAM stick in the laptop. I performed a RAM upgrade about a year ago replacing the original 2 sticks of 4GB with 2 sticks of 8GB from Crucial so I still had the original 4GB sticks handy. I installed a 4GB stick along with the 8GB stick and retried the Memory Diagnostic test. This time the test passed with no issues and my laptop was showing 10GB of RAM installed. Everything was good again except I lost 4GB of RAM in the process.
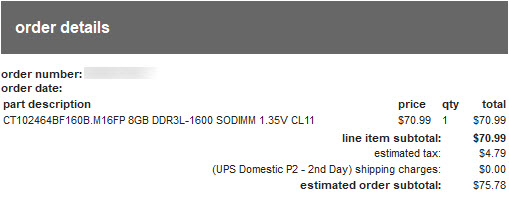
Now for the good news! Crucial Memory carries a Limited Lifetime Warranty which means I was able to go to their website, file a Return Authorization with them, send them my bad memory stick, and then receive a brand new replacement! Sure it cost me a few bucks to send them my defective memory stick but in return, they sent me the brand new 8GB stick free of charge. You can see below that their warranty saved me about $76!
The turn around time from when I sent them my RAM stick to when I received my new RAM stick was about a week. When I received the replacement, I installed it and then went back through the testing process above with Windows Memory Diagnostic and it passed with both 8GB sticks installed.
For the final test, I ran another backup of my laptop with automatic verification and it passed verification. So I really did end up having a hidden RAM issue that never showed itself until I went to do a backup verification.
I always do a backup with verification for obvious reasons and when the verification fails, Reflect deletes the backup. At the time I was too freaked out about the thought of losing data that I didn’t think to try a backup without verification so that I could test it later to see if the issue was really with the created backup or if it was just an issue with Macrium not being able to verify it correctly due to the bad RAM stick. So if you’re reading this because you are in the same boat that I was in, make a test backup to test verification on later and let me know what happens!
I would like to add that I did not purchase these RAM sticks directly from Crucial originally. I purchased them from Amazon because they were cheaper on there and yet Crucial still stood by their warranty! Thanks Again Crucial!

